Asg 9: Shade a simple A|W object

Objectives

Following Assignment 08, used to display a simple aw_t object, e.g., a simple cube, in this assignment add in the capability to shade the object via OpenGL's lighting capability.

Assignment

  1. Use the C++ code from Assignment 08 to set up a 3D perspective projection and to manipulate the camera's viewpoint and to read in the A|W object.
  2. Add to the face_t object a float vector to represent the face's normal, i.e., std::vector<float> norm.
  3. Add a public member function to the face_t class calc_norm(const aw_t& obj) which computes the face normal via the cross product of two of the face's edges.
  4. To avoid circular header file dependency, you will need to add a forward declaration to the face.h header file, just above the class face_t class definition:
    	class aw_t;
    	
    This lets the compiler know that such an object exists. Don't forget to add
    	#include "aw.h"
    	
    to the top of your face.cpp implementation file.
  5. Set up keyboard callbacks for object and camera transformations as before.

Details

  1. Camera and OpenGL perspective details are the same as in Assignment 08.
  2. Object I/O is the same as in Assignment 07.
  3. To compute the face normal, use the following loop to compute the cross product of two vectors C = B x A:
            std::vector      A(3,0.0), B(3,0.0), C(3,0.0);
    
      // cross product
      for(int j=0;j<3;j++)
        C[j] = \
          B[((3+j-1)%3)] * A[((3+j+1)%3)] - \
          A[((3+j-1)%3)] * B[((3+j+1)%3)];
    	
    Store (copy) the contents of vector C into the face object's norm vector.

Requirements

  1. To enable GL lighting, you must, during GL initialization, i.e., inside the initializeGL() function, specify light positions and colors. For example, to specify both for GL_LIGHT0
            GLfloat light0_pos[4]   = { -50.0,   0.0,   0.0,   0.0 };
            GLfloat light0_color[4] = {    .1,    .1,    .7,   0.25 };
    	
    specifies a cold blue light along the x-axis. To turn on this light, tell GL that it exists, i.e.,
      glLightfv(GL_LIGHT0, GL_POSITION, light0_pos);
      glLightfv(GL_LIGHT0, GL_DIFFUSE,  light0_color);
    	
    and then enable this light and GL's lighting system:
      glEnable(GL_LIGHTING);
      glEnable(GL_LIGHT0);
    	
    Try setting up a number of lights—GL allows up to about 8 or 9 (I think).
  2. When drawing the object, you must specify the face normal prior to drawing the face, e.g.,
          glNormal3f(the_objects[i]->faces[f]->norm[0],
                     the_objects[i]->faces[f]->norm[1],
                     the_objects[i]->faces[f]->norm[2]);
          glBegin(GL_POLYGON);
    	... // specify face vertices via glVertex3f(...)
          glEnd();
    	

Input

  1. The cube-ccw.obj file used to test the above program is:
    v 1.0 1.0 1.0
    v 1.0 1.0 -1.0
    v 1.0 -1.0 1.0
    v 1.0 -1.0 -1.0
    v -1.0 1.0 1.0
    v -1.0 1.0 -1.0
    v -1.0 -1.0 1.0
    v -1.0 -1.0 -1.0
    g cube
    f 1 5 7 3
    f 2 1 3 4
    f 5 6 8 7
    f 6 2 4 8
    f 2 6 5 1
    f 8 4 3 7
    	
  2. An object is represented by a list of vertices, basically a list of 3D points similar to what was used previously to display a plane.
  3. Each vertex is now used in a list of faces (polygons) that define the spatial boundary of the object. For a cube, there are 6 quadrilaterals.
  4. Note that, in general, you cannot assume that all objects are composed of quads; they could be composed on n-sided faces, or polygons. You cannot therefore assume that each face will have 4 indices into the vertex list. There will be at least 3 and at most n where n is unknown. For this reason we use the STL std::vector containers, which keep track of the size of the list.

Output

  1. Expected output with the above input file is whatever you need to help you diagnose and debug the program, e.g.,:
    GL: 2.1 NVIDIA-10.2.1 310.41.15f01 NVIDIA Corporation
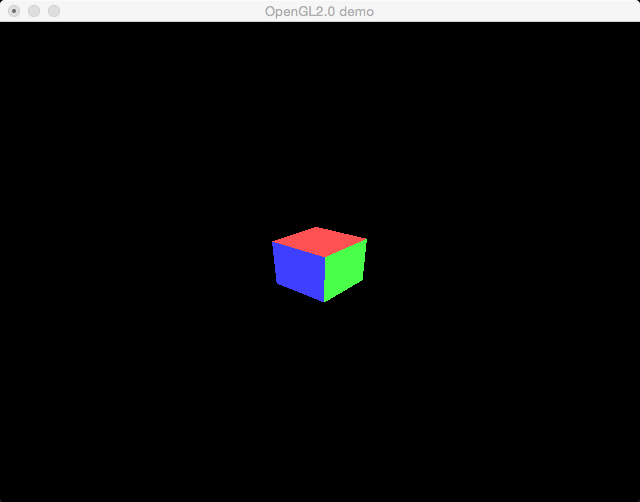
    number of verts read in: 8
    number of faces read in: 5
    *** printing object list
    v 1.0 1.0 1.0
    v 1.0 1.0 -1.0
    v 1.0 -1.0 1.0
    v 1.0 -1.0 -1.0
    v -1.0 1.0 1.0
    v -1.0 1.0 -1.0
    v -1.0 -1.0 1.0
    v -1.0 -1.0 -1.0
    g cube
    f 1 5 7 3
    f 2 1 3 4
    f 5 6 8 7
    f 6 2 4 8
    f 2 6 5 1
    	
    it is a good idea to print out the object parsed in, to make sure you can read the object data and then reproduce it by iterating through the vertex and face lists.

  2. When you have the object read in and stored properly, and you have GL lighting turned on, it should show up as below (there are three lights in the scene, R, G, B, one along each axis):

  3. When you test your program, what should happen is that lights stay in place, e.g., as you rotate the cube, the face at right should be illuminated by the green light. That is, as the cube rotates, the face that rotates into the light's light cone, that face will take on the light's color. If you see that the color "sticks" to each face as it rotates, you're doing it wrong.

Supplemental

  1. Here is a Makefile that you can use to compile the project:
    .SUFFIXES: .c .o .cpp .cc .cxx .C
    
    UNAME = $(shell uname)
    PLATFORM = $(shell uname -p)
    
    CC = g++
    COPTS = -g -Wall
    
    INCDIR =
    LIBDIR =
    
    ifeq ("$(shell uname)", "Linux")
    INC = \
      -I/usr/lib/glut-3.7/include
    LIBDIR = \
      -L/usr/lib -L/usr/X11R6/lib -L/usr/lib/glut-3.7/lib/glut
    LIBS = \
      -lglut -lGLU -lGL -lXmu -lXi -lXext -lX11 -lm
    else
    ifeq ("$(shell uname)", "Darwin")
    LIBS = \
      -framework OpenGL -framework GLUT -framework Foundation -lstdc++
    endif
    endif
    
    .c.o:
    	$(CC) -c $(INCDIR) $(COPTS) -o $@ $<
    
    .cpp.o:
    	$(CC) -c $(INCDIR) $(COPTS) -o $@ $<
    
    all : main
    
    OBJECTS = \
    point.o \
    face.o \
    vertex.o \
    aw.o \
    camera.o
    
    main : $(OBJECTS) main.o
    	$(CC) -o $@ $(INCDIR) $(COPTS) $(OBJECTS) $@.o $(LIBDIR) $(LIBS)
    
    point.o: point.h point.cpp
    
    clean :
    	rm -f *.o
    	rm -rf main
    	

Turn in

Turn in all of your code, in one tar.gz archive of your asg##/ directory, including:
  1. A README file containing
    1. Course id--section no
    2. Name
    3. Brief solution description (e.g., program design, description of algorithm, etc., however appropriate).
    4. Lessons learned, identified interesting features of your program
    5. Any special usage instructions
  2. Makefile
  3. source code (.h headers and .cpp source)
  4. object code (do a make clean before tar)

How to hand in

See handin notes

Grading scheme